Dangerous site error arises because the appearance indicates that Google has blacklisted a harmful website due to security concerns. The warning specifically relates to sites that are likely phishing scams, designed to mimic legitimate websites in order to steal users’ personal information.
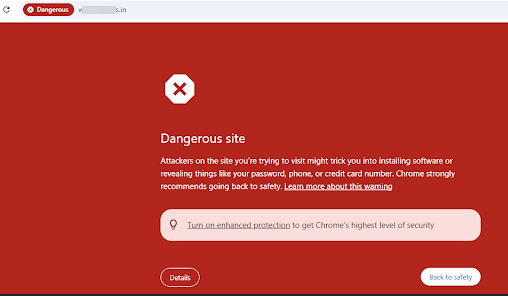
Table of Contents
Lets try to reslove this issue
How to Verify Your Domain with Google
Google offers several methods for domain verification, and the DNS TXT record method is one of the most common as it doesn’t require adding any code to your site.
- DNS TXT Record This method involves adding a TXT record to your DNS provider. If your domain is registered with LinuxSupportWorld or you manage your DNS with them, follow the steps below to add the TXT record.
- Step 1: Retrieve the TXT Record To get the TXT record, go to the “Alternate Methods” tab in Google Search Console and select “Domain Name Provider.” Choose your provider from the drop-down list, or select “Other” if it’s not listed. The TXT record will look something like this: “google-site-verification=7122-hgsm-7199-HJZB.”
- Step 2: Add the TXT Record Once you have the TXT record, add it to your DNS provider’s settings. If you’re using LinuxSupportWorld DNS, you can add the TXT record directly from your cPanel.
How to resolve the Dangerous site error issue
First, visit https://search.google.com/
Next, click on “Add Property” and then enter the website URL, such as xyz.com.
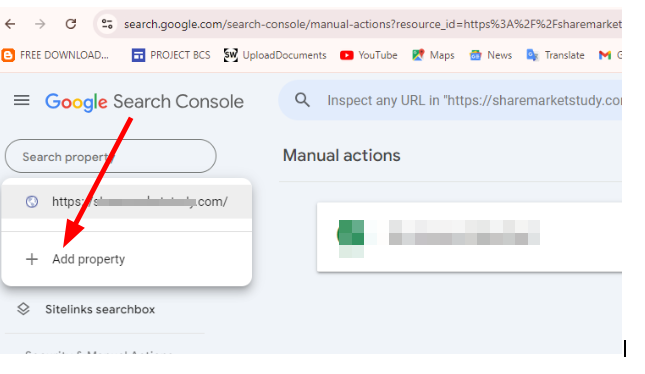
When you submit an infected URL, it triggers a scan of your domain in Google Search Console, formerly known as Google Webmaster Tools. This feature detects security issues within websites, but it will only work if your site is connected to Google Search Console and you still have access to the platform.
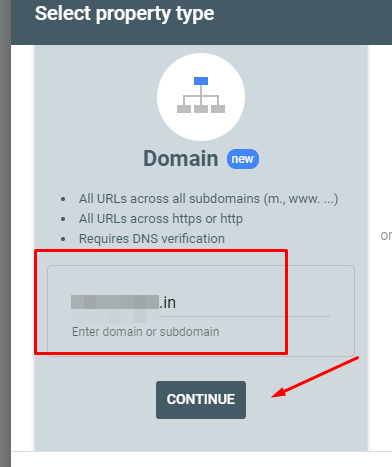
Add your domain name in the provided field and click “Continue.”
Next, verify your ownership in Google Search Console by following the given instructions. This step ensures that you have control over the website and can access important insights. Once verified, you’ll be able to monitor and resolve any issues related to your site’s security and performance.
Veryfieng Domain Ownership in Google Search Console
To verify your domain ownership in Google Search Console, you’ll need access to your hosting provider to add a TXT DNS record. By the end of this post, you’ll be able to do this, even if you’re unfamiliar with what a DNS record is.
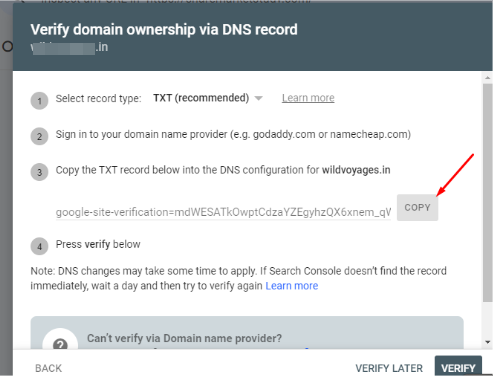
Copy the domain verification TXT record you’ll get
Log into your hosting account (I’ll be using cPanel for this example). For details specific to your hosting provider, you can refer to the information here. Then, locate the “Zone Editor” under the Domains section.
Select the domain you want to verify in Google Search Console and click “Manage.”
Next, add a new record and choose “TXT” as the record type. Complete the remaining fields with the following details:
- Zone Name: your domain name
- TTL: 3600
- Text: the verification text you copied in the previous step.
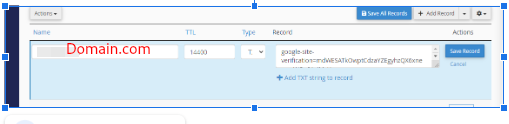
After filling in all the fields, click “Add record” to save it.
Then, return to Google Search Console and click “Verify.”
Don’t be concerned if your domain ownership isn’t verified immediately. In my case, I initially saw this message: “google-search-console-domain-ownership-verification-failed-min.”
It can take some time for your DNS records to update and for Google to recognize them. For me, verification happened in 2-3 minutes. I simply clicked “Verify” a few more times, and eventually, I got the confirmation.
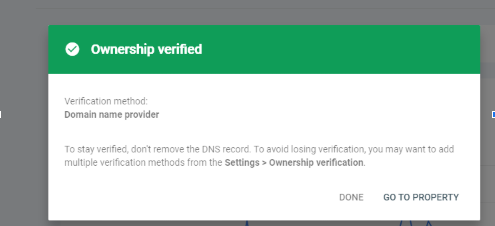
If Google approves your request, it will remove your site from its blacklist and re-index your pages. The “Dangerous site error” warning should be gone within 72 hours.
How to Avoid the Dangerous site error Warning
Although there are ways to fix the “Dangerous site error” warning, it requires time and effort to resolve. To reduce the likelihood of encountering this issue, we recommend taking proactive steps to prevent it from happening in the first place.
Use an SSL certificate
Use an SSL certificate to secure connections between your server and browsers, ensuring data is transmitted over HTTPS. Google encourages SSL implementation for website security and uses it as a ranking factor, while flagging non-HTTPS sites with a “deceptive site” warning.
If your WordPress site lacks SSL, get one as soon as possible to boost branding and avoid penalties.
Many hosting providers, like Hostinger, offer free SSL certificates, or you can purchase one from a Certified Authority. After installation, make sure to redirect your site to HTTPS to ensure secure access.
Do regular updates
Regularly updating your WordPress site is crucial for performance and security. Keep the WordPress core, themes, and plugins up to date to fix security vulnerabilities and enhance functionality.
Enabling auto-updates can save time and reduce the risk of errors, ensuring your site stays protected against malware.
Secure your site login
To prevent the “Deceptive site ahead” warning, invest in strong security plugins, use a secure hosting provider, and ensure your site has an SSL certificate.
Regular updates to WordPress core, themes, and plugins help protect against vulnerabilities. Additionally, practice safe browsing, protect your login page with strong credentials, and enable two-factor authentication (2FA) for extra security.